.webp)
.webp)

How to Seal and Maintain Pavers in San Diego's Climate
August 17, 2026
In San Diego, pavers usually last longer when you clean them well, let them dry fully, use the right sealer for your location, and reseal every 2 to 5 years.
Your biggest risks are simple: UV, salt air, rain, joint sand loss, and poor drainage. Coastal homes often deal with salt and damp air. Inland homes often deal with 95°F to 105°F summer heat. And winter storms can drop 2 to 3 inches of rain in 24 hours, which can expose drainage problems fast.
Here's the short version:
- Seal driveways, pool decks, and outdoor kitchen areas first
- Use penetrating sealer if you want a natural look and better grip
- Use film-forming sealer if stain resistance and richer color matter more
- Use polymeric sand where weeds, washout, or joint movement are common
- Wait for a dry weather window, usually April through November
- Do not seal if rain is expected within 24 hours
- Keep foot traffic off for 24 hours and vehicles off for 48 hours
- Reseal every 2 to 3 years for driveways and 3 to 5 years for patios and walkways
- Fix drainage first if water pools longer than 24 hours
A fast side-by-side view:
| Area or Issue | What matters most | What to do |
|---|---|---|
| Coastal patios | Salt air, marine moisture | Use a breathable sealer and watch for sand loss |
| Inland driveways | Heat, strong sun, fading | Use a UV-resistant sealer and reseal sooner |
| Wet areas near pools | Slip risk | Avoid slick finishes or add anti-skid |
| Sloped or runoff-prone areas | Joint washout, shifting | Refill sand, check slope, fix drainage |
| White haze or chalky film | Moisture and mineral movement | Clean the spots and correct water issues |
If you want your pavers to keep their color, stay stable, and resist stains, the main job is straightforward: clean, dry, sand, seal, and keep an eye on drainage and wear through the year.
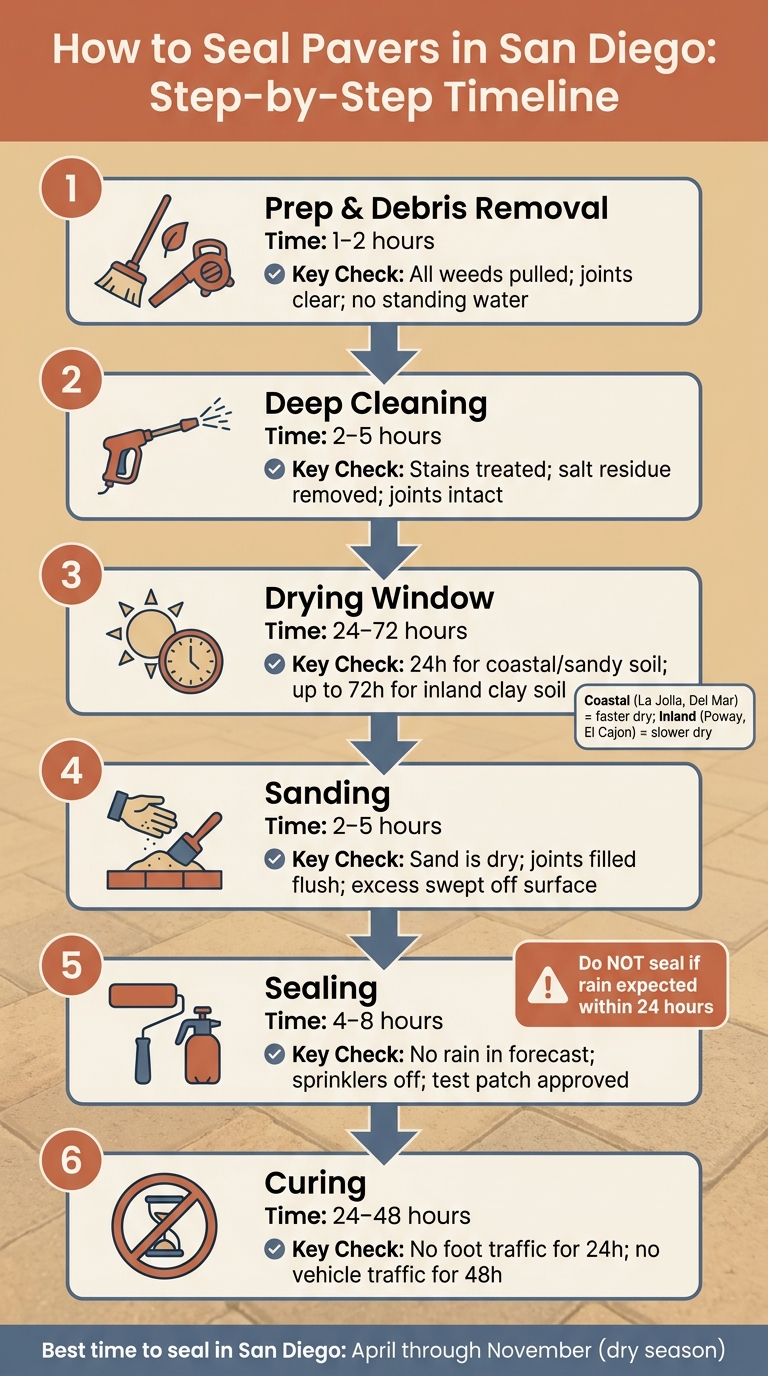
How to Seal Pavers in San Diego: Step-by-Step Timeline
1. Why San Diego Pavers Need Special Attention
San Diego’s climate shifts enough from one area to the next that pavers in one neighborhood can age in a very different way than pavers a few miles away. That changes both how they wear down and how often they need care.
Local Climate Stressors: Salt Air, Marine Moisture, Heat, and UV
Coastal areas like La Jolla, Del Mar, and Coronado deal with salt air and marine moisture. That mix can wear down porous pavers and keep shaded joints damp for long stretches.
Inland areas like Poway, El Cajon, and Escondido run into a different issue: intense sun and heat. Summer temperatures there regularly reach 95°F to 105°F. When driveways and patios sit in full sun, they absorb and hold that heat. Over time, that puts stress on the paver surface and speeds up color fading. Concrete pavers tend to take the hit more than most.
Canyon-adjacent properties in Rancho Santa Fe and Olivenhain have their own headache. Runoff and sloped ground can wash out joint sand and put pressure on the base below the pavers.
Drainage adds another layer. Sandy coastal soil sheds water fast, while inland clay can stay wet for 48 to 72 hours after storms. That matters because drainage affects joint stability. On wetter sites, prep work and resealing matter more.
Put simply, local conditions shape how hard a surface gets pushed and how often it needs sealing and upkeep.
When Sealing Is Necessary vs. Optional
Sealing isn’t always a must. On low-wear surfaces, it can be optional. But for pavers that deal with heavy traffic or harsh exposure, it moves into the must-do category.
Driveways, pool decks, and outdoor kitchen areas should come first because they deal with the most wear, staining, and day-to-day use.
Coastal homes should treat sealing as a high priority since salt air speeds up surface wear on porous paver material. Slow-draining sites also get a lot from sealer, though it’s worth saying plainly: if drainage is bad, the source of the problem still needs to be fixed.
Lower on the list are sheltered garden paths and low-traffic walkways. These surfaces don’t take the same beating, and durable natural stone can often hold up fairly well without sealer for longer periods.
Once the exposure level is clear, the next move is picking the right sealer, sand, and tools.
sbb-itb-2b3b7d5
2. How to Choose the Right Sealer, Sand, and Tools
Choose the sealer, sand, and tools based on the surface, weather exposure, and how much traffic the area gets. A patio with light foot traffic needs something different from a driveway that sees cars every day.
Penetrating vs. Film-Forming Sealers for Patios, Driveways, and Walkways
Penetrating and film-forming sealers protect pavers in different ways.
Penetrating sealers are a good fit if you want to keep the pavers looking natural while still giving them breathable protection. They leave the surface more natural and textured, which many homeowners prefer for patios and walkways. They also tend to last longer between coats and are usually safer when the surface gets wet.
Film-forming sealers sit more on top of the paver. They add richer color and a glossy finish, so they make more sense when appearance is a big part of the goal. They also offer stronger stain resistance. The tradeoff is that they need more upkeep and can get slick, especially around pools or other wet spots. In those areas, anti-skid additives are a must.
Finish Options, Joint Sand, and Tools to Have Ready
If you go with a film-forming sealer, pick the finish based on the look you want. Matte, satin, or gloss can change the whole feel of the space. For wet areas, add anti-skid additives so the surface has better grip.
For joint sand, the choice is pretty simple:
- Use standard joint sand for basic patio installs.
- Use polymeric sand when stability matters more, especially where heavy rain, weeds, or joint washout are a concern, like driveways and exposed walkways.
You should also have the right tools ready before you start. For cleaning and prep, use a power washer for deep cleaning, a stiff-bristle broom, a push broom for spreading sand, and a plate compactor to settle sand into the joints. If the paver system is permeable, bring in a professional vacuum sweeper to clear debris from the joints. For the sealer itself, use either a low-pressure sprayer or a heavy-duty nap roller.
Once you've picked the products, the surface needs to be cleaned and fully dry before sealing.
3. How to Clean, Sand, and Seal Pavers Step by Step
Once you’ve picked the right sealer and sand, the next part comes down to prep and dry time. That’s what often makes the difference between a finish that lasts and one that starts failing too soon.
In San Diego, it’s best to plan this kind of job during the dry season, from April through November. Don’t seal if rain is expected within 24 hours, if there’s a heavy marine layer hanging around, or if sprinklers might run while things are drying. Keep irrigation off the whole time: during cleaning, drying, and sealing.
How to Prepare and Clean the Surface
Start simple. Sweep or blow away all loose debris first. Pull visible weeds by hand so they don’t come back up through the joints after sealing. Then look for standing water or low spots. If water is pooling anywhere, let it drain all the way before moving on.
For cleaning, pressure wash the surface with a fan-tip nozzle at low to moderate PSI. The goal is to clean the pavers without scarring or shifting them. Work section by section, and rinse each area well before moving forward.
In coastal spots like Pacific Beach or Del Mar, salt residue and marine moisture can leave more buildup behind, so deeper cleaning matters more. If you notice efflorescence, treat only the spots that need it instead of applying remover across the entire surface.
How to Dry, Sand, and Apply Sealer Correctly
Dry time can vary a lot based on location. Coastal areas with sandy soil, like La Jolla or Del Mar, usually dry faster. Inland places such as Poway, Santee, or El Cajon can hold moisture much longer. So before you move on, check the timing table below and match it to your area.
Once the pavers and joints are fully dry, sweep joint sand into the gaps and clear all extra sand off the faces of the pavers. If you’re using polymeric sand, mist it lightly after sweeping. But do that ONLY after you’ve confirmed the surface is completely dry. If it isn’t, you can end up with a white haze that’s tough to remove.
Before sealing the whole area, test the sealer on a small, out-of-the-way spot. That gives you a chance to check the color and sheen first. If it looks good, apply the sealer in thin, even coats. Don’t let it pool in low spots.
After that, keep people off the surface for 24 hours and keep vehicles off for 48 hours.
Time Estimates for Each Phase
Use the timings below as a starting point for a typical San Diego project.
| Phase | Estimated Time | Key Check Before Moving On |
|---|---|---|
| Prep & Debris Removal | 1–2 hours | All weeds pulled; joints clear; no standing water |
| Deep Cleaning | 2–5 hours | Stains treated; salt residue removed; joints intact |
| Drying Window | 24–72 hours | 24h for coastal/sandy soil; up to 72h for inland clay soil |
| Sanding | 2–5 hours | Sand is dry; joints filled flush; excess swept off surface |
| Sealing | 4–8 hours | No rain in forecast; sprinklers off; test patch approved |
| Curing | 24–48 hours | No foot traffic for 24h; no vehicle traffic for 48h |
4. How to Fix Common Paver Problems and Set a Maintenance Schedule
After sealing, routine care helps keep pavers from fading, loosening, or picking up stains. Even a solid install can run into problems over time, especially in San Diego, where strong sun, coastal salt air, and winter rain all take a toll. The good news? Once you know what's causing the issue, the fix is usually pretty straightforward.
Fading, Weeds, Sand Loss, Efflorescence, and Stains
Fading is one of the most common issues homeowners notice. San Diego gets 266 sunny days per year, and all that UV exposure slowly washes out paver color. If the surface starts to look dull, clean it and reseal it on schedule to slow more color loss.
Weed growth usually points to neglected joints. The fix is simple: pull the weeds by hand, power wash the area, and refill the joints with polymeric sand. Regular blowing and sweeping help too, especially in fall when leaves and organic debris start piling up.
Joint sand loss happens a lot near the coast. Wind, marine moisture, and heavy winter rain can wear away the sand between pavers faster than many homeowners expect. When that happens, add matching joint sand to bring back stability.
Efflorescence is the white, chalky film that sometimes shows up on pavers. It forms when moisture moves minerals up to the surface. You'll usually see it more after heavy rain or in spots with poor drainage. Scrub it with a specialized efflorescence cleaner, then deal with the drainage issue underneath so moisture stops moving through the base.
Stains from oil or food are much easier to handle early. Because pavers are porous, stains sink in the longer they sit. Spot-clean with a degreaser or power wash the area before resealing.
Drainage Wear, Resealing Intervals, and Routine Inspections
Drainage trouble can hide for months during San Diego's long dry stretch, then show up all at once when winter rain hits. Look for water pooling near the foundation, puddles that stick around for more than 24 hours, or erosion channels along the edges of the pavers. Those are all signs the slope isn't moving water away well enough.
For most San Diego yards, the target grade is 2% to 5%. That's about a 2.5-inch drop over 10 feet. If the surface is too flat, water sits, seeps into the base, and slowly leads to shifting or uneven pavers.
For resealing, a good rule of thumb is:
- Every 2 to 3 years for driveways with regular vehicle traffic and heavy sun exposure
- Every 3 to 5 years for patios and walkways with lighter use
Inland areas like Poway or Santee usually land on the shorter end of those ranges because UV exposure and heat are harsher there.
Use this table as a quick fix guide:
| Problem | Likely Cause | Short-Term Fix | Long-Term Solution |
|---|---|---|---|
| Fading | UV exposure (266 sunny days/year) | Clean and apply color-enhancing sealer | Reseal every 2–3 years (driveways); 3–5 years (patios) |
| Weeds in Joints | Neglected joints / organic buildup | Manual removal + power washing | Polymeric sand + routine sweeping |
| Joint Sand Loss | Coastal wind, marine moisture, or heavy rain erosion | Top off with matching joint sand | Apply joint-locking sealer |
| Efflorescence | Moisture pulling minerals to the surface | Scrub with specialized cleaner | Improve subsurface drainage |
| Oil/Food Stains | Porous surface absorption | Spot-clean with degreaser | Reseal surface |
| Pooling Water | Poor slope or clay soil saturation | Clear surface debris; fill minor low spots | Re-grade to 2–5% slope |
| Shifting Pavers | Expansive clay soil or insufficient base depth | Re-level individual pavers | Correct slope and base issues before resealing |
A simple seasonal routine goes a long way:
- Spring: Deep clean the surface and inspect joints after winter
- Summer: Sweep often and keep an eye on UV fading
- Fall: Clear leaves and debris before the rainy season
- Winter: Check for pooling and drainage issues after storms
Conclusion: Keep Pavers Looking Good with the Right Sealer and Regular Care
Once your pavers are sealed, check them now and then, and reseal when needed. Long-term protection comes from that habit, not from the initial application. If your patio came out of a backyard remodeling project, this maintenance schedule is what keeps that investment looking the way it did on day one.
In San Diego, pavers take a beating from strong UV rays, salty coastal air, and heavy winter rain. The sealer you choose, and how well you keep up with reapplication, decides how the surface holds up over the years.
Location matters more than many homeowners think. Coastal yards in Del Mar need a penetrating sealer, since salt air is part of daily life there. Hotter inland spots like Poway or Escondido call for a UV-resistant sealer instead.
Drainage still matters after sealing. Water sitting on the surface loosens joints and wears down the sealer faster. Keep a 2% to 5% grade across the surface so water drains away before it turns into a bigger problem.
Inspect the surface after winter storms, reseal on schedule, and fix drainage issues early. The crew at United Turf & Pavers checks these three things on nearly every resealing job in San Diego, coastal or inland.
FAQs
How do I know if my pavers need sealing now?
Look for wear like sun fading, efflorescence, or stains that no longer come up with normal cleaning.
You should also keep an eye on joint sand loss and extra weed growth between pavers. Both can cause the pavers to shift over time. A professional site assessment can help confirm whether the sealer has worn off or whether conditions like coastal salt air have made maintenance needed sooner.
What type of sealer is safest for pool deck pavers?
The information provided here doesn't identify the safest type of sealer for pool deck pavers.
If you want a clear recommendation, you'll need more specific guidance on the sealer itself - such as the surface type, slip resistance, chemical makeup, and whether it's made for poolside use.
Can I seal pavers if some areas still hold water?
No. Don’t seal pavers if they’re still holding water.
Sealing can trap moisture under the surface. That can lead to staining, sealer failure, or more damage over time.
Standing water usually means there’s a drainage problem, like not enough slope or poor sub-base prep. Fix that first.
In San Diego, proper installation needs at least a 1% slope. That works out to a 1-inch drop per 10 feet.